Quinoa Burrito Bowls

*tap tap tap*

Is this thing on?

Is anyone still here?

You are?

All 5 of you?

Whew.

I know, I’ve been totally MIA here lately.  I’ve been swamped with a wedding catering job a few weeks ago and have barely had time to cook anything remotely blog worthy.  And even when I do, I’m usually starving and have no energy to try to take a picture of it.  And if I do manage to take a picture, it just sits on my camera for weeks at a time until I have time to edit pics and actually blog them.

Well, luckily that time finally came this weekend.  I’ve caught up a little on life, edited a few pics, and I might actually start haivng some regular posts again.

If you remember correctly, we’ve been trying really hard here at the PLFF house to cut back on processed foods.  We’ve cut out a ridiculous amoung of carbs from our diet and have been filling up on fruits, veggies, and whole grains.  And in that search for the healthier, I discovered quinoa.

Now some of my favorite blogs have been writing about quinoa for a while now.  Call me jaded, but I was skeptical.  It just sounded… too healthy.  I mean, I like healthy, but I’m not a rabiit food and cardboard for dinner kind of girl.

But quinoa truly is fabulous.  It’s technially a seed, not a grain.  So it’s super nutty, and has a great bite to it, like good al dente brown rice.  Now, will I ever pick quinoa over pasta?  Of course not.  But I certainly like quinoa enough to satisfy my carb craving without blowing my calories for the day.

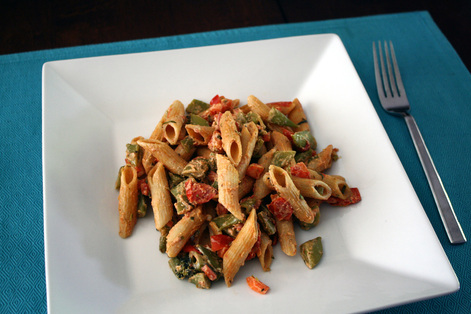
One year ago: Pasta Primavera with Goat Cheese and Tomatillo Chipotle Salsa
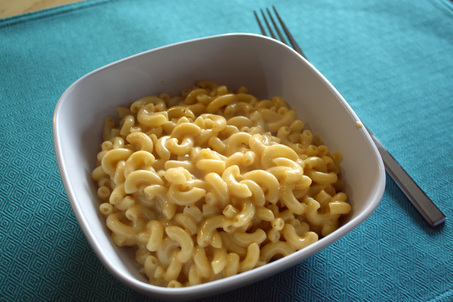
Two years ago: Blackened Chicken over Garlic Lime Pasta and Mega-Berry Crisp

Quinoa Black Bean Burrito Bowls
adapted from the Shiksa in the Kitchen

1 cup quinoa
1 cup chicken/vegetable stock
1 tbsp olive oil
1/2 onion, chopped
2 cloves garlic, minced
2 cans black beans, rinsed and drained
1/2 cup cilantro, chopped
1/2 tsp chili powder
pinch of cayenne
1/4 cup fresh lime juice
toppings such as shredded cheese, Greek yogurt, salsa, diced tomatoes, avocado, etc

Pour quinoa in a medium saucepan with chicken/vegetable stock and 1 cup of water (2 cups liquid total).  Bring to a boil.  Cover and reduce heat to medium low.  Let simmer for 20 minutes (closer to 25 for high altitude folks).  Stir occasionally.

While quinoa is cooking, heat olive oil in a medium skillet over medium high heat.  Add onions and cook until softened.  Add garlic and cook 1 minute.  Add balck beans, half of cilantro, chili powder, cayenne, and 2 tbsp lime juice.  Reduce heat to low.  Season with salt to taste.  Stir occasionally and keep warm until quinoa is ready.

When the quinoa is fully cooked, remove from heat and fluff with a fork.  Stir in remaining cilantro and remaining lime juice.  To assemble bowls, divide quinoa between four bowls.  Top with black beans and your toppings of choice.  Serve warm.

Enjoy!

Goat Cheese Mac and Cheese


So there’s been a very sad development here in the PLFF house here lately.  About 6 months ago I realized I was lactose intolerant.

Seriously one of the worst days of my life.

I still have day dreams of ice cream.  And brie. And tetrazzini.  And a cold glass of milk with breakfast.

But, I’m surviving.

I buy chevre (soft goat cheese) in bulk.

And I put almond milk in my chai.

And I’ve found an absolutely amazing sheep’s milk pecorino romano that kind of makes my eyes roll back in my head.

And one beautiful day, I decided to combine all of the above.

It was kind of a magical day.

So lactose intolerant or not, you really should make this mac and cheese.  You can use regular milk.  Just don’t brag about it, ok?

And don’t forget to enter the OXO food scale giveaway!  Enter by tonight at 11pm! (MST)

One year ago: “Must-go” Quiche and Roasted Green Beans
Two years ago: Beer Brats and Salsa Chicken

Goat Cheese Mac and Cheese
a PLFF original recipe

8 oz short cut pasta, like shells
4 cloves of garlic, minced
2 tbsp butter (or non-dairy substitute)
2 tbsp all purpose flour
1 1/2 cups whole milk (or unsweetened almond milk)
1 tsp salt
1/2 tsp black pepper
1 tbsp fresh thyme
8 oz chevre (soft goat cheese)
1 cup shredded parmesan or pecorino romano cheese

Boil pasta according to package directions.  Drain and set aside.

Melt butter in a large saucepan over medium heat.  Add garlic and saute 1 minute until just soft.  Add flour and whisk to combine.  cook for 2 minutes, or until just golden brown and thick.  Gradually stir in milk, whisking constantly until any lumps have dissolved.  Cook 2-3 minutes until thickened. Season with salt, pepper and thyme.  Break up chevre and add it and parmesan/pecorino to sauce, whisking to combine.  Season to taste with additional salt and pepper.  Toss with pasta and serve immediately.

Enjoy!

Butternut Squash Risotto


Risotto never gets old.  Whether it’s more of a classic risotto or something crazy like this, I could eat risotto everyday without it getting old.

But when my friend Christine made this risotto the last time we came over for dinner, I knew it was love.

This risotto has those layers of flavor that TV chef judges are always talking about.  The flavors have depth, warmth, and it’s just damn good.

This risotto is a tad time consuming.  Not generally for your weeknight dinner.  The squash has to be roasted and pureed, the onions have to be caramelized all before anything even gets started.  So save this one for the weekend.  But it’s so worth it.  And have people over when you make it. Because 1. it makes enough for an army, and 2. this is the kind of dish that show people you love them.  It takes time, care, and a little caressing to get it just right.  And when you eat it, you can feel at that time and love.  Sounds cheesy, but it’s so true.

One year ago: The Indulge Salad
Two years ago: Amish Friendship bread and starter

Butternut Squash Risotto
adapted from William Sonoma

1 medium butternut squash, peeled and cubed
salt and pepper
olive oil
6 cups chicken or vegetable stock
2 large yellow onions, sliced thin
2 cups Arborio rice
2 tbsp minced fresh sage
1 tsp fresh rosemary
1/2 cup dry white wine
1/2 cup grated Parmesan cheese

Preheat oven to 450.  Place cubed butternut squash on a baking sheet lined with foil.  Drizzle with olive oil, season with salt and pepper.  Roast for approximately 20 minutes, or until fork tender.  Remove from oven, let cool.  Puree in food processor or with handheld blender.  Transfer to medium saucepan and add chicken stock, whisking to combine.  Bring to a simmer over medium high heat.  Reduce heat to low and keep warm.

Meanwhile, heat 3 tbsp olive oil to a large skillet with high sides over medium low heat.  Add onions, stirring to coat in oil.  Cook onions, stirring occasionally, until dark brown and caramelized, approximately 20 minutes.

Add rice to pan with onions.  Stir until rice is coated and nearly translucent, about 3 minutes.  Stir in sage and rosemary.  Add wine and stir until wine is absorbed.

Add the simmering stock one ladle-ful at a time, stirring constantly after each addition.  Wait until stock is almost completely absorbed before adding more, stirring frequently to develop the starch.  By last ladle-ful, rice should have cooked 20-25 minutes (high altitude folks, this is more like 30-35).  Stir in parmesan cheese and season to taste with salt and pepper.  Serve immediately.

Enjoy!

Classic Minestrone Soup

Here it is, the beginning of a new year – full of resolutions of eating healthier and getting in shape. 

And I’ve started off the year with two cupcake recipes. 

Sorry about that.

Let’s start over.

This soup is everything people start looking for at the beginning of the new year – it’s healthy, quick, vegetarian, freezable, and can easily be doubled for extras.  Which is what I did, with visions of a healthier go-to lunch for the winter months when my typical salad veggies aren’t in season.  I portioned them out in individual sized portions and stuck them in the freezer to pull a few out each week for lunch.  Is working out well so far.  Below is the recipe for just a regular batch. 

And this can easily be adapted to meet the tastes of even the pickiest eaters.  Cannellini beans instead of kidney, zucchini instead of green beans, or all of the above.  It’s just a vessel for cramming as many veggies as you can into one soup.   Which, let’s be honest, after a few weeks of potlucks and cookies and extra calories, we can all use a little more veggies. 

Yes, even you.

Check out some of my other favorite soup and chili recipes!
Sweet Potato and Rosemary Soup
Leek and Potato Soup
Chunky Italian Soup
Gameday Chili
Denver Green Chili
Chicken Chili

Minestrone Soup
adapted from Ellie Krieger, as seen in Food Network Magazine

2 tbsp olive oil
1 large onion, diced
4 cloves garlic, minced
2 stalks celery, diced
1 large carrot, peeled and diced
1/3 pound green beans, trimmed and cut into 1/2 inch pieces (or 1 1/2 cups frozen green beans)
1 tsp dried oregano
1 tsp dried basil
28 oz can diced tomatoes (no salt added)
14 oz can crushed tomatoes (no salt added)
6 cups low-sodium chicken or vegetable broth
15 oz can low sodium kidney beans
1 cup elbow or ditalini pasta
parmesan cheese, for serving

Heat olive oil in a large pot over medium high heat.  Add the onion, celery, and carrot and cook until starting to soften, about 4 minutes.  Add garlic and cook for 1 minute.

Stir in green beans, dried herbs, 3/4 tsp salt and 1/2 tsp pepper (adjust to taste), and cook an additional 3 minutes. 

Add the diced and crushed tomatoes and chicken or vegetable broth and bring to a boil.  Reduce heat to medium-low and simmer for 10 minutes.  Stir in kidney beans and pasta and cook until pasta is tender, about 10 minutes.  Season with salt and pepper. 

Ladle into bowls and top with parmesan cheese.

Enjoy!

Sweet Potato and Rosemary Soup

Tis the season for soup!

I’m not sure about y’all, but come Friday night, I’m whooped.  Some people want quick and easy dinners for during the week after they get home from work.  But not me.  I’m way more likely to cook a complicated dinner on Tuesday night than I am a Friday night.  Tuesdays I’ve been at work all day, sure, but cooking is kind of my way to decompress at the end of the night.  But by Friday… not only is it the end of a long day, but it’s the end of a long string of long days.  Come Friday, I’m usually more concerned about pouring myself a glass of wine than I am about what we’re having for dinner.

So when I see recipes like this, with few ingredients and simple instructions, I knew I was going to be a fan.  And it was just as simple and easy as I hoped it would be.  It was creamy (without adding any cream), flavorful, and like so many good soups, it just seemed to warm me up from the inside out.  So  the next time you think you’re too tired to cook, pull out this recipe, pour yourself a glass of wine, and put your feet up.  You’ve earned it! 🙂

One year ago: Caramelized onion dip

Creamy Sweet Potato and Rosemary Soup
courtesy of Giada DeLaurentis

3 tbsp unsalted butter
3 tbsp olive oil
3 large shallots, thinly sliced
3 cloves garlic, minced
salt and pepper
2 lbs orange sweet potatoes, peeled, trimmed, and cut into 1/2 inch pieces
2 6-inch long stems of fresh rosemary, leaves removed and chopped
6 cups low sodium chicken stock
4 oz mascarpone (I subbed reduced fat cream cheese, worked fine)
3 tbsp maple syrup

In a large stock pot, melt butter and oil together over medium high heat.  Add shallots and garlic.  Season with salt and pepper and cook until soft, about 3-4 minutes.

Add sweet potatoes, rosemary and chicken broth.  Season with salt and pepper.  Bring the mixture to a boil, then reduce heat and simmer until the sweet potatoes are very tender, 20-25 minutes.  Ladle, in batches, into a food processor and blend until smooth (can also use an immersion blender).  Add all of blended soup back into stock pot.  Whisk in mascarpone (or cream cheese) and maple syrup, stir until smooth.  Season to taste with salt and pepper.  Keep the soup warm over low heat until ready to serve.

Enjoy!

Canned Tomato Sauce

So I mentioned earlier this week the ridiculous amounts of tomatoes I had coming from the garden.  Well, one weekend I made a batch of salsa, canned it, and used up all the tomatoes I had on the counter.  Whew!  By the next weekend, I had double the amount of tomatoes I did the weekend before.  I didn’t want more salsa, or we’d be eating salsa all year long!  So I figured I’d try my hand at tomato sauce – regular, plain old tomato sauce.  We use it all the time, whether in tetrazzini, spaghetti sauce, or hundreds of different recipes.  It certainly wouldn’t go to waste.

And what’s great about this recipe is that there isn’t really a recipe.  While it calls for 45 pounds of tomatoes (ok, even I didn’t have that many tomatoes!), it’s easily adjusted for however many tomatoes you have.  It’s all about how to process the tomatoes before you can them.  Easy peesy!  I will say – I easily had like 5 pounds of tomatoes, and ended up with 3 pints.  So it cooks down A LOT.  So don’t bother if you have only a handful of tomatoes.

One year ago: Spicy Carbonara (so quick to make!)

Canned Tomato Sauce
adapted from the Ball Blue Book

tomatoes (how every many you have, but make sure it’s a lot!)
bottled lemon juice

Wash tomatoes and drain.  Remove core and blossom ends.  Cut tomatoes into quarters and drop in large sauce pot.

Simmer tomatoes over medium-low heat for 20 minutes.  Puree (in batches, if necessary) in food processor and strain to remove seeds and peels.

Place pulp back in sauce pot and heat over medium high heat until the sauce thickens, stirring often to prevent sticking.  Reduce volume by half.

Add 1 tbsp of lemon juice into the bottom of each pint jar (2 tbsp for quarts).  Ladle hot sauce into hot jars, leaving 1/2 inch head space.  Adjust 2-piece caps.  Process pints for 35 minutes, quarts 40 minutes (Denver, add 10 minutes.  Above 6,000 ft, add 15) in a boiling water canner.

Cool completely before storing.

Enjoy!

Jalapeno Salsa for canning

My tomatoes were absolutely insane this year.  And here we are, a hop, skip, and a jump from October and I’m still pulling tomatoes off my plants by the handful.  I’ve never once complained, because there is very little more wonderful than fresh tomatoes from the back yard in the summertime.  But when you’ve literally got over a hundred tomatoes sitting on the counter, there’s only so many tomato sandwiches or cucumber tomato salads you can make.  Enter canning.  I canned a few pints of this salsa and a few pints of regular old tomato sauce to use later in the winter when I’m  left daydreaming about spring.  Nothing like some garden fresh salsa for when it’s chilly and snowing outside! And while canning isn’t necessarily a quick process, it’s a relatively simple one if you have the right equipment.  And one trip to Target can yield all that you need.

If you’re a canning beginner, I highly recommend getting the Ball Blue Book – guide to preserving.  It will give you all of the step-by-steps  for prepping your jars and lids, peeling your tomatoes or fruit, processing, etc.  I could walk you through all of that, but let’s be honest, no one wants a 4 pages blog post about canning.  So I’ll share the recipe itself.  If you have any questions about the canning process, don’t hesitate to ask!

One year ago: Grilled Peaches

Jalapeno Salsa
courtesy of the Ball Blue Book
yields 2-3 pints

3 cups peeled, seeded, cored, and chopped tomatoes
3 cups chopped jalapenos, keeping seeds and ribs.   (I know it seems like a lot, but trust!)
1 cup chopped onion
6 cloves garlic, minced
2 tsp oregano
2 tbsp minced cilantro
1 1/2 tsp salt
1/2 tsp cumin
1 cup cider vinegar

Combine all ingredients in a large sauce pot.  Bring mixture to a boil.  Reduce heat and simmer for 10-15 minutes, until at least half of liquid has boiled out.  Ladle hot salsa into hot jars, leaving 1/4 inch head space.  Adjust 2-piece caps.  Process for 15 minutes (Denver folks, add 10 minutes.  Above 6,0000 ft, add 15)in a boiling water canner.

Let cool completely before storing.

Enjoy!

Mexican-Style Skillet Pasta

I haven’t really advertised this to Scott, but we’ve been trying to eat more vegetarian meals around the PLFF household these days.  Too much ice cream, this girl has got to start watching her waistline!  He’s a very “must have meat in every meal!” kinda guy, so I’ve been on the search for recipes where you really don’t notice that the meat is missing.  And when I saw this recipe, I knew I could fool Scott into eating a meat-less meal.  Oh, and did I mention this was a one-pot, super quick meal I could easily make during the week with stuff I pretty much always have on hand?!  1+1+1+1+1+1 =  a meal that will most certainly be making a regular appearance on our meal plan.  It was spicy, hearty and filling.  And fairly figure friendly.  Win-win 🙂

One year ago: Crock pot roasted pork loin

Mexican-Style Skillet Pasta
adapted from Milk and Honey, originally from the America’s Test Kitchen Family Cookbook

8 oz vermicelli pasta (I used whole wheat)
2 tbsp olive oil
1 medium onion, diced
2 cloves garlic, minced
1/2 tsp cumin
14.5 oz can fire-roasted diced tomatoes
15 oz can black beans, drained and rinsed (can also sub chorizo or chicken)
1 1/2 cups chicken or vegetable broth
1-2 chipotles in adobo, chopped
salt and pepper
shredded sharp cheddar cheese (for serving)
1/4 cup minced cilantro (for serving)

Heat 1 tbsp of oil over medium high in a large skillet.  Add pasta and toast until golden, about 4 minutes.  Transfer to a paper-towel lined plate to cool.

Add remaining tbsp of oil to the skillet and heat over medium heat.  Add onion and cook until softened, about 5 minutes.  Add garlic and cumin and cook until fragrant, about 2 minutes.  Stir in tomatoes (with juice), black beans, broth, and chipotle peppers.  Bring mixture to a bubble, season with salt and pepper.

Stir in the toasted pasta.  Reduce heat to low, cover, and cook, stirring occasionally, until all the liquid has been absorbed and pasta is tender, about 15 minutes.

Top with cheese and cilantro and serve.

Enjoy!

Pasta Primavera with Goat Cheese

Picture

I used to be one of those people.  You know… those people.  I used to decide I didn’t like things before I even tried them, especially if they sounded, you know… weird.  Things like venison, asparagus, guacamole, and goat cheese.  Come on, goat cheese sounds… weird.  It’s like… from a goat.  But oh, then there came a beautiful day.  I don’t remember what I was trying or why I decided to try it, but I discovered that not only do I like goat cheese (and venison, asparagus, and guacamole for that matter), but that I LOVE goat cheese.  It’s salty, tangy, and downright delicious. 

Are you one of those people?  You are, aren’t you.  You don’t think you don’t like goat cheese.  You’re wrong.  I know it.  And to show you how wrong you are, I’m going to give you a recipe with goat cheese that you can’t refuse.  It’s creamy (without any heavy cream), full of veggie goodness, and full of wonderful goat cheese.  If you’re even slightly scared of goat cheese, this recipe will break that habit.  Promise!

One year ago: Basic Bruschetta

Pasta Primavera
adapted from Food Network Magazine

8 oz penne pasta or any short-cut pasta
1/4 cup extra virgin olive oil
2 large carrots, diced
4 cloves of garlic, minced
1 red bell pepper, diced
1/2 lb sugar snap peas, cut in half or thirds
1/2 tsp red pepper flakes
salt and pepper
1 pint cherry tomatoes, halved
1/4 cup roughly chopped fresh basil
4 oz goat cheese (I used a garlic and herb blend)

Bring a large pot of salted water to a boil.  Cook pasta according to package directions.  Reserve 1/2 cup of cooking water before draining.  Drain pasta and set aside.

Meanwhile, heat olive oil in a large skillet over medium heat.  Add carrots, garlic, bell pepper, and snap peas.  Season with salt, pepper and red pepper flakes.  Cook, stirring occasionally, until veggies start to get tender, about 5-7 minutes.  Add the tomatoes and cook an additional 2 minutes, or until tomatoes start to wilt.  Stir in drained pasta, reserved cooking water, basil and goat cheese.  Stir to combine, continue to stir until goat cheese has melted and coasted pasta and veggies. 

Enjoy

A foodie’s holy grail – the perfect mac and cheese!

Picture

It’s like the holy grail.  We search and we search and we try countless times with no luck.  No spark.  Sure, they’re good, but they just aren’t “the one.”  We get our hearts broken when it just doesn’t turn out.  Sometimes you have such high hopes, only for those hopes to get shattered. 

My search for the perfect mac and cheese has gone on for years.  Wait, what did you think I was talking about? 🙂

But it’s so true.  Every foodie has their favorite mac and cheese recipe, but as I’ve learned in my search, we all have different qualities we like in our mac and cheese (much like our seach for true love): some like the baked mac and cheese, some don’t (I fall in this latter category), some like a thicker consistency, some like it creamier, etc.  One person’s favorite mac and cheese is another’s disappointment.  And as you may have noticed, there is not a single mac and cheese recipe in my archives.  Don’t believe me?  Go look, I’ll wait…..

See?  None.  That’s because all mac and cheese recipes up until this point have left me disappointed.  They’ve been too grainy (hate it when that happens!) from a bad combo of cheeses and lack of good, smooth melting, or the consistency is too thick, not enough flavor, etc.  Every mac and cheese to this point has been deemed not worthy of passing on to you.  Until now.

Ok, so it may seem like I’m being dramatic, but I want you to know how much I’m behind THIS mac and cheese.  It’s not the fanciest, but when I want a good, classic mac and cheese, this is the recipe I will always being going back to.  And this is the only one so far that I feel confident enough to pass on to you. 

Hope you like it as much as I do!  And thanks Amy (and your mom) for finally giving me a mac and cheese that I adore!!

One year ago: Tortilla Pie and Roasted Rattatouille Pasta


Classic Mac and Cheese

as seen on Sing for Your Supper, original source unknown (she got it from her mom, doesn’t get better than that!)

16 oz elbow macaroni pasta
2 tbsp butter
2 tbsp flour
1/2 tsp ground mustard
salt and pepper
12 oz can evaporated milk (I used 2%)
1 cup shredded cheddar cheese
8 oz Velveeta cheese, cubed

Boil the pasta according to package directions, drain and set aside.

While pasta is boiling, melt butter in a large pan over medium heat.  Whisk in flour, ground mustard, salt and pepper, cook for 1 minute.  Slowly pour in evaporated milk and whisk constantly until it thickens.  Add cheeses and stir until melted.  Add macaroni noodles to sauce and stir to combine.  Serve immediately.

Enjoy!